


Marrakesh’s deserts offer stunning opportunities for photographers, but the conditions demand preparation. From rocky terrains in the Agafay Desert to the golden dunes of the Sahara, capturing these breathtaking landscapes requires the right timing, gear, and techniques. Here’s how you can make the most of your desert photography in Marrakesh:
- Shoot during golden hours (sunrise and sunset) for soft, warm lighting.
- Use natural patterns and leading lines like sand ridges and dunes to guide the viewer’s eye.
- Pack essential gear like a sturdy tripod, wide-angle and telephoto lenses, and a polarizing filter to handle harsh sunlight and sand.
- Experiment with angles – try low or elevated perspectives for unique compositions.
- Plan your locations using tools like Google Earth and apps like PhotoPills for lighting predictions.
- Include movement or people for scale and storytelling, like camel caravans or wind-blown sand.
- Protect yourself and your camera with UV filters, weather covers, sunscreen, and light-colored clothing.
- Adjust camera settings for desert light, using the Sunny 16 rule and low ISO for sharp results.
- Try night photography to capture starry skies in Marrakesh’s low-light-pollution areas.
- Respect local customs and nature by treading lightly and seeking permission before photographing people.
Whether you’re after sweeping vistas or detailed close-ups, these tips ensure your photos reflect the desert’s beauty while staying prepared for its challenges.
A Photography Road Trip in Morocco
1. Pick the Best Time for Lighting
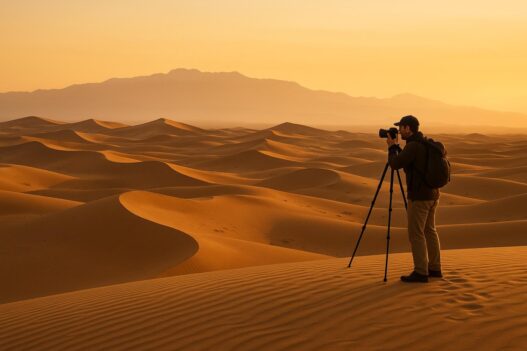
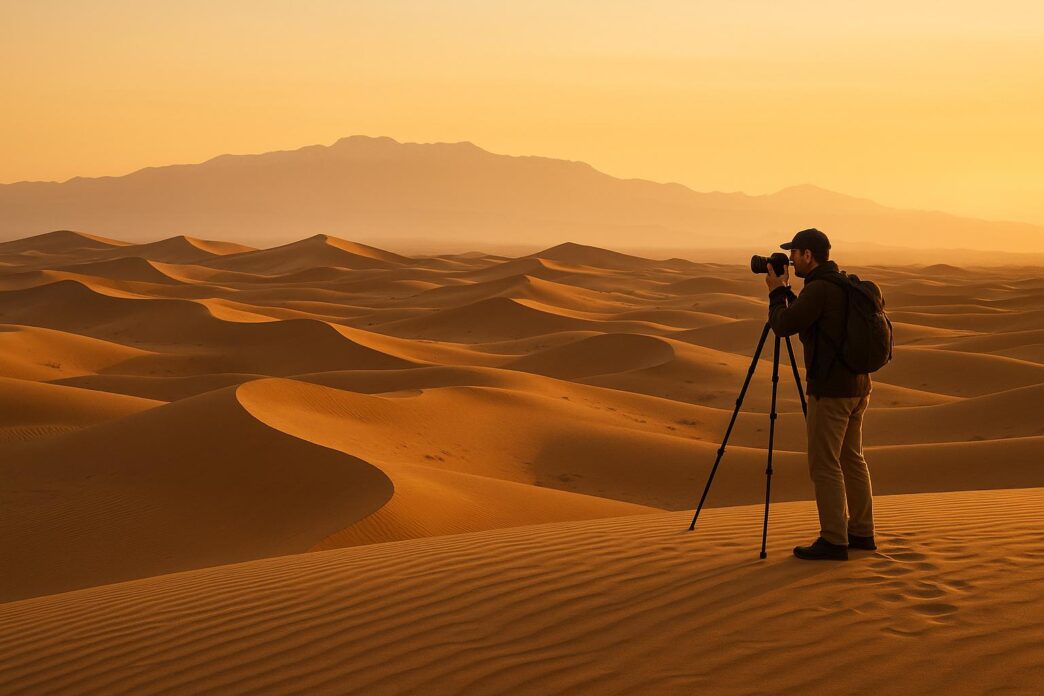
The golden hours around sunrise and sunset turn Marrakesh’s desert landscapes into a visual masterpiece. During these times, the sun sits low on the horizon, casting soft, warm light that enhances textures and highlights natural colors. Both morning and evening light bring their own unique charm to your desert photography.
In the morning, the golden hour carries a serene, awakening vibe. As the sun rises, shadows stretch across the sand, and the cool tones of dawn gradually warm up. The low-angle light accentuates every ripple in the sand and every crack in the rocks, creating depth and texture that’s perfect for storytelling.
Evening golden hour, on the other hand, bathes the desert in rich amber and gold hues. The landscape takes on a dramatic glow, with silhouettes of shrubs and grasses standing out beautifully against the sky. Backlighting during this time can add layers of interest to your shots, giving even the smallest desert plants a striking presence.
Golden hour isn’t just about aesthetics – it offers technical benefits too. Softer light makes it easier for your subjects to avoid squinting. Plus, as the light transitions from golden to pastel tones, you get a variety of moods to work with in one session.
To make the most of this magical time, arrive at least 30 minutes early. This allows you to set up and fine-tune your settings as the light changes. Be prepared to adjust quickly – switching from f/11 to a shallower depth of field or tweaking your white balance to enhance the warm tones. Also, remember to tread carefully; footprints can disrupt the pristine look of the desert.
Finally, don’t rush to pack up. Stay a bit longer than planned – you might catch unexpected moments as the light continues to shift, revealing hidden details you didn’t notice before.
2. Use Leading Lines and Patterns
The desert landscape of Marrakesh is a treasure trove of patterns and natural leading lines. The curving dunes naturally guide the viewer’s eye, creating a dynamic flow within your frame.
Look for prominent sand ridges to act as natural leading lines. Once you spot one, position yourself so it draws the viewer’s gaze deeper into the expansive sea of sand.
"Use the lines and shapes of the sand to create leading lines that draw the viewer’s eye into the scene. These can be created by the patterns in the sand, the shapes of the dunes, or other elements in the landscape." – Photographers Trail Guides
A telephoto lens can work wonders here. By isolating distant dune patterns and cropping out the sky, you can reveal fascinating shapes and forms that might otherwise go unnoticed. This approach transforms everyday sand formations into striking abstract compositions, emphasizing the desert’s natural geometry.
Lighting plays a key role in bringing these patterns to life. Side lighting, especially during the golden hours, creates dramatic contrasts and adds depth to the scene with long, well-defined shadows.
Pay attention to the smaller details, too. Wind-sculpted ripples in the sand offer intricate, close-up opportunities. These subtle patterns can be framed using the same principles of visual flow as the larger dunes.
For a unique perspective, try shooting from a higher vantage point. Aim your camera downward to emphasize the leading lines and reduce the amount of sky in your composition. This technique enhances the immersive feel of the desert landscape and pairs beautifully with the technical adjustments we’ll explore later.
3. Choose the Right Equipment
Photographing Marrakesh’s desert landscapes demands gear that can handle sand, wind, and intense sunlight. The right equipment ensures you’re ready to capture the stunning desert scenery without being held back by challenging conditions.
A sturdy tripod is a must for sharp, stable shots on uneven, sandy ground. Look for tripods with secure leg locks and vibration dampeners to hold steady in windy conditions. Models that disassemble easily are helpful, and it’s smart to extend only the lower legs halfway to protect the locks. Always brush off sand before packing it away . Once your tripod is set up, the next step is choosing the best lenses for the scene.
For the desert’s sweeping views, a wide-angle lens in the 16–35mm range is perfect. To highlight intricate details or compress distant dunes into a dramatic composition, a telephoto lens like a 70–200mm is a great choice.
A polarizing filter can make a big difference by cutting glare and reducing atmospheric haze. When using a wide-angle lens, adjust the polarizer carefully – especially when shooting at a 90° angle to the sun – to avoid uneven bands of dark blue in the sky . Opt for a multi-coated polarizer to reduce ghosting and lens flare.
Protecting your camera from sand and dust is just as important. A weather-sealed camera body is ideal for desert conditions, but even a simple rain cover or plastic bag can shield your gear during windy moments. Keep a cleaning kit on hand, including microfiber cloths and a blower, to remove stubborn sand particles .
Taking care of your equipment not only keeps your camera in top shape but also gives you more time to focus on capturing the desert’s magic. With the right tools and preparation, you’ll be ready to tackle Marrakesh’s breathtaking landscapes.
4. Try Different Angles and Viewpoints
The desert’s flat, open terrain might seem straightforward at first glance, but shifting your perspective can completely transform your photos. The desert landscapes around Marrakesh are a perfect playground for experimenting with angles that highlight both the immense scale and intricate details of this breathtaking environment. This strategy ties seamlessly with earlier tips on lighting and patterns.
Elevate your perspective to showcase the desert’s vastness. Climb to the top of dunes, find nearby hills, or use a drone to capture sweeping views of sand formations stretching endlessly toward the horizon. From above, patterns and textures that might be invisible at ground level come to life, creating dramatic and captivating shots.
Low-angle shots offer a completely different take. By lowering yourself to the ground and aiming your camera upward, you can create a sense of depth that emphasizes the curves and lines of the dunes. This technique adds grandeur to the sand formations, and using a camera with a tilting LCD screen can make these tricky angles much easier to manage. Pairing this with a wide-angle lens amplifies the dramatic effect.
Changing angles also enhances the impact of leading lines in your composition. Use the crests of dunes to guide the viewer’s eye toward focal points in your frame. Side lighting can further bring out the natural lines by casting shadows and highlights that emphasize the sand’s textures and patterns.
To take your compositions to the next level, plan ahead and scout your locations. Visit potential spots at different times of day to observe how light and shadows shift. Capture a mix of sweeping vistas and close-up details, turning the desert into a dynamic, three-dimensional scene packed with visual intrigue.
5. Plan and Scout Your Locations
Great desert photography doesn’t just happen – it starts with careful planning. Around Marrakesh, the landscapes are vast and varied, offering endless opportunities for stunning shots. But knowing where to go and when to be there can turn ordinary photos into unforgettable captures of the desert’s essence.
Explore the three main desert options near Marrakesh, each offering a distinct backdrop for your photos. The Agafay Desert, just 40 minutes from the city, is known for its rocky terrain, perfect for moody, dramatic compositions. If you’re after the classic golden dunes, head to Erg Chebbi near Merzouga, about an 8.5-hour drive away, or Erg Chigaga near Zagora, roughly 6 hours from Marrakesh. Deciding on your destination is the first step toward making the most of your photography adventure.
Once you’ve picked a desert, use digital tools to fine-tune your plan. Google Earth is a fantastic resource for identifying promising locations, including nearby Berber camps and key dunes. Apps like PhotoPills can help you predict sun positions, ensuring you’re ready for the best lighting conditions. Save your chosen spots on Google Maps for easy navigation, especially if you’re shooting during sunrise or sunset when visibility can be limited.
In 2019, photographer Michael Breitung used Google Earth to locate the camp Al Koutban in Erg Chigaga, Morocco, and later joined a photography workshop there in early 2020.
Scout your locations at the right time of day. Visiting your chosen spots during the time you plan to shoot will help you understand how the light interacts with the landscape. For example, photographing Marrakesh’s bustling streets early in the morning avoids crowds and harsh lighting. In the Agafay Desert, aim to arrive about an hour before sunset for the most dramatic conditions.
| Desert Location | Distance from Marrakesh | Ideal For | Travel Time |
|---|---|---|---|
| Agafay Desert | ~25 miles | Rocky landscapes, day trips | 40 minutes |
| Zagora (Erg Chigaga) | ~220 miles | Sandy dunes, quieter crowds | 6 hours |
| Merzouga (Erg Chebbi) | ~350 miles | Classic Sahara experience | 8.5+ hours |
Consider joining photography-specific tours. These tours are designed to get you to the best spots at the perfect times, often including lesser-known viewpoints that aren’t on standard tourist routes. Local guides can also introduce you to hidden gems you might otherwise miss.
Plan your budget carefully for scouting trips. Tours to the Agafay Desert start at around $37, while multi-day trips to Merzouga can begin at approximately $165. If you’re visiting multiple locations, renting a car is an option, with prices starting at about $9 per day plus fuel. However, navigating Marrakesh’s busy streets might be tricky if you’re not used to the traffic.
To make the most of your time, focus on locations that allow you to start shooting right away. Look for ridges or elevated spots to minimize distractions and maximize your chances of capturing the desert’s raw beauty.
sbb-itb-fa26f1f
6. Include Movement and People
Desert landscapes, while breathtaking, can sometimes feel lifeless without a touch of movement or the presence of people. Adding human elements, animals, or even motion like wind-blown sand can turn static scenes into captivating stories.
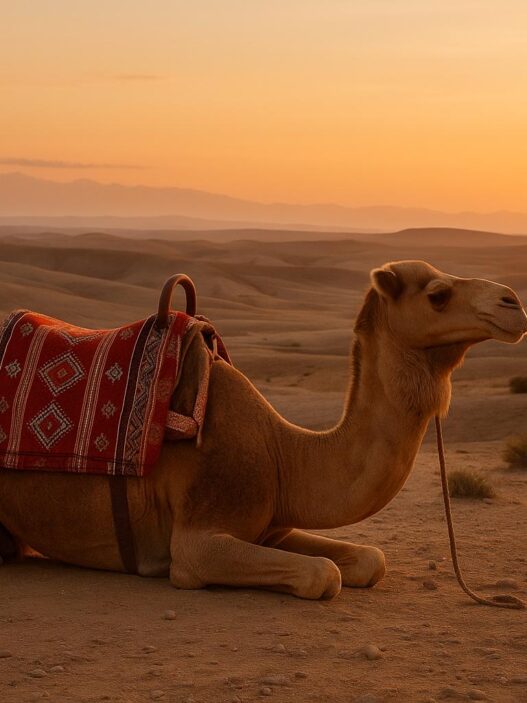
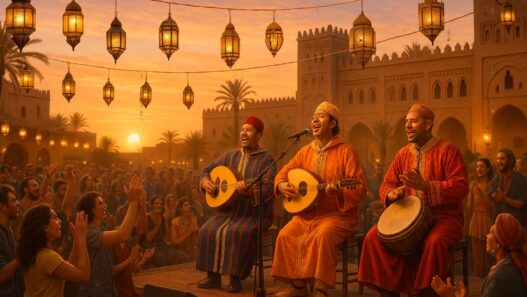
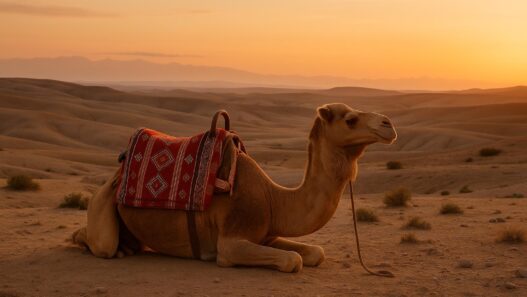
People and animals provide a sense of scale in desert photography. For instance, the sheer vastness of Marrakesh’s desert becomes strikingly apparent when you include a lone figure crossing the dunes or a caravan of camels winding through the Agafay Desert. A solitary silhouette against towering sand dunes immediately conveys the enormity of the landscape.
Wind-blown sand injects energy into your shots. Look for scenes where light and shadow play across the moving sand. Backlighting works wonders here, highlighting the swirling particles and creating dramatic silhouettes. You’re most likely to catch these moments during the windier parts of the day, especially in the late afternoon when thermal currents are at their peak.
When photographing subjects in motion – like camels walking in a line or people trekking across dunes – opt for a moderately fast shutter speed to freeze the action while preserving sharp details. A versatile 24-105mm zoom lens or a 70-200mm telephoto lens is ideal for capturing distant subjects without disrupting their natural flow.
"I want people to care, to fall in love, to take action." – Joel Sartore, Founder of The National Geographic’s Photo Ark
Incorporating local subjects not only enhances the sense of scale but also adds depth to your narrative. Always ask for permission before photographing locals, especially those in traditional attire or working with camels. Learning phrases like "Mumkin sura?" (May I take a photo?) in Arabic shows respect for the culture. A warm smile and a simple greeting like "Salam alaikum" can open doors to more genuine portraits.
Take the time to connect with your subjects. Chat with them, agree on any compensation upfront, and avoid misunderstandings. Small gestures like sharing prints, making a purchase, or enjoying a meal together can leave a lasting positive impression.
For candid shots, use longer lenses to maintain a respectful distance while capturing authentic moments. Whether it’s locals engaged in daily activities or camels resting under a rocky outcrop, keeping your distance ensures you don’t disturb the natural flow.
7. Protect Yourself and Your Camera
Once you’ve chosen the right gear, the next step is making sure both you and your equipment can withstand the harsh desert conditions of Marrakesh. The combination of sand, heat, and wind can pose serious challenges to photographers and their tools.
Protecting Your Camera
Desert sand can be a nightmare for your camera, scratching lenses and creeping into delicate mechanisms. To guard against this, always use a UV filter on your lenses. It’s a simple yet effective way to block dust and prevent scratches. When you’re not actively shooting, keep your lens cap on – this small habit can save you from costly repairs caused by airborne particles.
For particularly sandy conditions, wrapping your camera in cling film can help keep particles out while still allowing access to essential controls. If you plan to shoot for extended periods, investing in a dedicated camera cover designed to block wind and sand is a smart choice. These covers protect your gear without compromising functionality.
Extreme heat can also damage your equipment. To prevent overheating, use a space blanket to shield your camera from direct sunlight and store unused gear in the shade. If your camera does start to overheat, give it time to cool down before continuing.
Protecting Yourself
The desert isn’t just tough on your camera – it can be equally tough on you. Loose, light-colored clothing with long sleeves and pants will help keep you cool and protect your skin from the sun. A large scarf or turban can shield your face and neck from both the sun and blowing sand.
Don’t forget sunscreen. Apply it generously to all exposed skin, even if the weather feels mild. A wide-brimmed hat is another must-have, offering extra protection for your face and helping you stay comfortable under the intense desert sun.
Keeping Your Gear Clean
After a day of shooting, sand will likely find its way into every crevice of your gear. Use a blower and a camel hair brush to gently remove sand from your camera and lenses. Before packing up, give your equipment a thorough cleaning and store it in a weatherproof bag to protect it from further exposure. To avoid the risk of dust getting inside your camera, try to avoid changing lenses outdoors. If you need to switch lenses often, consider carrying a second camera body with a pre-mounted lens.
8. Adjust Camera Settings for Desert Light
Shooting in the desert presents a unique challenge: harsh sunlight can easily overexpose your photos. To capture the beauty of this environment, it’s essential to fine-tune your camera settings. Switching to manual mode gives you the control needed to handle the intense light effectively.
Start with the Sunny 16 Rule
A great starting point is the classic Sunny 16 rule. Set your aperture to f/16, your shutter speed to 1/100 second, and your ISO to 100. This serves as a reliable baseline for bright conditions. From there, tweak these settings based on your camera’s light meter and histogram to achieve the right exposure.
Fine-Tune the Exposure Triangle
Once you’ve set the baseline, refine your exposure triangle to suit the current lighting. Keep your ISO low – between 100 and 200 – to reduce noise. For shutter speed, aim for faster settings, like 1/2000 to 1/4000 seconds, and adjust your aperture to f/8 or f/11 for sharper results. This balance ensures your photos retain detail without overexposure.
Get the White Balance Right
White balance is key to capturing the desert’s warm tones. Using the "Daylight" or "Sunny" setting typically produces natural colors. If you want to enhance the scene with a subtle yellow tone, try "Cloudy" or "Shade." For more precision, use a manual Kelvin setting: 5,000–6,000K for typical daylight and 6,000–7,500K during golden hours when the light is softer and warmer.
Rely on Your Histogram
In bright desert conditions, your camera’s LCD screen might not give you an accurate representation of exposure. Instead, trust your histogram to evaluate highlights and shadow detail. Slightly underexposing your shots can help preserve highlight details, which are often harder to recover in post-processing.
Use Helpful Accessories
A polarizing filter can work wonders in the desert. It minimizes glare from sand and rocks while boosting color saturation and contrast in the sky and landscape. If you’re shooting panoramas or using bracketed exposures, consistent manual settings will make post-processing much smoother and more efficient.
9. Try Night and Star Photography
The desert near Marrakesh offers a spectacular canvas for night photography, with its pristine skies and minimal light pollution. The area boasts Bortle ratings of 1–2, meaning nearly zero light interference, rivaling the remote Sahara Desert for stargazing. These conditions make it a paradise for capturing stunning starry skies and nightscapes, adding a whole new dimension to your photography after sunset.
Plan Your Desert Night Shoots
The best time for stargazing in Morocco is between October and April, thanks to cooler temperatures, lower humidity, and longer nights. To get the clearest views of faint celestial objects, schedule your shoots around the New Moon when the sky is at its darkest. During this period, you’ll have a chance to photograph iconic constellations like Orion, Taurus, and Gemini in winter, or Pegasus, Andromeda, and Perseus in fall. These conditions set the stage for capturing breathtaking images.
Dial In Your Camera Settings
For star photography in the desert, start with these settings: a 25-second shutter speed, an f/2.8 aperture, and ISO 1600. Photographer Phillip Van Nostrand shares his experience:
"I’ve found that it’s possible to get a good image of the stars almost every time with these settings: a 25-second shutter speed, an f/2.8 aperture, and an ISO of 1600."
If your lens has an f/4 aperture, try a 30-second exposure at ISO 1600. Keep your shutter speed to about 25 seconds to avoid star trails, and adjust your ISO to balance brightness and noise. Experimentation is key to finding what works best for your camera.
Compose with the Desert in Mind
Incorporate the desert’s natural features to make your night sky photos stand out. Use sand dunes as leading lines that guide the viewer’s eye toward the stars. Add depth by including foreground elements like rock formations, desert vegetation, or unique sand patterns. These details create a sense of place and make your compositions more engaging.
Boost Your Success Rate
Leverage technology to plan and perfect your shots. Apps like Stellarium or Sky Guide help you locate celestial objects, while PhotoPills can calculate precise shutter speeds using the NPF rule to ensure sharp stars without trails. Don’t miss special events like the Geminid meteor shower in mid-December, which can feature up to 120 meteors per hour – perfect for capturing dynamic action shots.
For post-processing, take multiple exposures and average them to reduce noise caused by high ISO settings. Capture a dark frame (a shot with the lens cap on) to eliminate hot pixels during editing. With these techniques and the desert’s untouched beauty, your night sky photos will reflect the awe-inspiring wonder of Marrakesh’s starry nights.
10. Respect Local Culture and Environment
Photographing the deserts of Marrakesh is about more than just capturing breathtaking landscapes – it’s also about embracing your role as a respectful visitor. These vast, picturesque settings are home to communities with deep-rooted traditions and an environment that requires careful preservation. By respecting both, you’ll not only enhance your photography but also help sustain the unique essence of Marrakesh.
Honor Local Customs and Traditions
When photographing people in Morocco’s desert regions, it’s essential to ask for permission first. A simple greeting like “Salam alaykum” followed by “Mumkin Sura?” (May I take your picture?) goes a long way. Some individuals may decline, and it’s important to respect their wishes. As Moroccan photographer Azizi Abdellah says:
"Marrakesh’s heart lives in its people, and photographing them is a privilege, not a right."
Special care should be taken when photographing women, elders, or individuals in traditional attire. For children, always seek explicit consent from their guardians. If someone requests a small tip for posing, view it as part of a meaningful cultural exchange. Dressing modestly – avoiding items like tank tops or shorts – can help you build trust with locals. Additionally, if you’re photographing in markets or near vendor stalls, consider making a small purchase as a gesture of goodwill.
Protect the Desert Ecosystem
Just as you respect the people of Marrakesh, it’s vital to protect the fragile desert environment. The desert’s thin soil crust, which can take decades to form, is easily damaged by careless footsteps. Stick to established paths whenever possible, and tread lightly even when venturing off-trail to capture that perfect shot. Avoid disturbing vegetation or fragile soil layers. Wilderness photographer Josh Cripps emphasizes this point:
"If your interaction with nature is detrimental to the experience that somebody else is having either now or in the future – because you’re leaving trash behind, or you’re damaging the trail, or you’re damaging wildflowers or something like that – then you’re screwing it up."
Practice Responsible Photography Ethics
Adopt a leave-no-trace approach. Pack out all your trash, even small items like lens caps or candy wrappers. Be mindful when using drones, as they can disturb wildlife and expose sensitive locations. Think carefully before sharing the exact locations of fragile or lesser-known spots on social media, as increased foot traffic can harm these areas. When in doubt, prioritize the well-being of the environment over getting the perfect shot.
Supporting local conservation efforts or hiring knowledgeable local guides can help you navigate both cultural and environmental considerations. Taking the time to connect with locals – whether over a cup of mint tea or through genuine conversations – often leads to more meaningful photographic moments that truly capture the spirit of Marrakesh’s desert culture. By honoring both the people and the land, you not only safeguard Marrakesh’s legacy but also create a richer, more authentic photographic story.
Conclusion
Photographing the desert around Marrakesh requires careful planning, a spark of creativity, and a deep respect for local culture. Together, these elements can turn your journey into a series of unforgettable images that truly reflect the spirit of Morocco’s wilderness.
Preparation matters. Use tools like Google Earth to scout your locations and ensure your gear is protected from the desert’s tough conditions. Once you’re ready, let your artistic instincts shape the way you frame each shot.
Creativity transforms the ordinary into the extraordinary. Play with angles, use leading lines, and find intriguing foregrounds to highlight the desert’s unique textures and lighting. The interplay of light and shadow in the desert is captivating, offering a chance to capture dramatic visuals. Look for interesting shapes in rock formations or include human elements to emphasize the vastness of the landscape. Landscape photographer Thomas Heaton puts it beautifully:
"It’s not about taking the picture. Technically that’s easy. It’s the seeing that’s difficult".
This quote serves as a reminder that while technical skills are important, the real magic lies in how you perceive and interpret the scene before you. Pair your imagination with a respectful approach to create meaningful and authentic images.
Respect is the bridge to genuine connections and thoughtful photography. Be mindful of the fragile desert ecosystem and engage with locals courteously. Sharing moments over mint tea or having heartfelt conversations can open doors to capturing the essence of Marrakesh’s desert culture. Always seek permission before photographing people, as this shows cultural sensitivity and builds trust.
The desert around Marrakesh offers endless opportunities for those who are patient, creative, and culturally aware. Whether you’re capturing the golden hues of sunrise over dunes, intricate patterns carved by the wind, or authentic snapshots of daily life, each image becomes part of Marrakesh’s story.
By combining detailed preparation, imaginative compositions, and genuine respect for the people and environment, your photography can go beyond beautiful landscapes to tell a story that resonates.
For more tips on travel and photography to make the most of your Marrakesh adventure, visit The Marrakesher. Their guides, cultural insights, and practical advice are tailored for English-speaking travelers exploring Morocco’s rich culture and breathtaking scenery.
FAQs
How can I protect my camera and gear from sand and sunlight while photographing Marrakesh’s desert?
To keep your camera safe from sand and strong sunlight, consider using a UV filter or a lens hood. These not only cut down on glare but also act as a barrier to protect your lens. A dust blower or a soft brush can help you gently clear away sand particles without risking scratches. When your camera isn’t in use, store it in a sealed rain sleeve or even a plastic bag to block out dust. Try to avoid switching lenses in windy conditions to keep sand from getting inside the camera. For extra safety, a padded camera case can shield your gear from dust and accidental bumps.
How can I capture Marrakesh’s desert culture and people in my photos respectfully?
To capture the essence of Marrakesh’s desert culture while being respectful, always ask for permission before photographing someone. Most locals appreciate the courtesy and might even show interest in your work when approached with kindness. Be aware of local customs – dress modestly, respect personal space, and avoid taking photos during private or sensitive moments. Steer clear of angles that might feel intrusive.
When engaging with people, greet them warmly and express a genuine curiosity about their traditions. This approach not only fosters trust but often leads to more natural and heartfelt photographs. By honoring their values, your images will reflect the true spirit of Marrakesh’s lively culture.
What are the best camera settings for capturing stunning daytime and nighttime shots in the Marrakesh desert?
For daytime photography, aim for an aperture setting between f/8 and f/11 to capture sharp, detailed images. Keep your ISO at 100 or 200 to reduce noise, and use a shutter speed of about 1/250 to 1/400 seconds to handle the bright desert sunlight effectively.
When it comes to nighttime photography, switch to a wide aperture like f/2.8, increase your ISO to somewhere between 800 and 1600 depending on the available light, and set a long exposure time of around 15–20 seconds to capture the stars or low-light scenes beautifully. Always shoot in RAW format to give yourself more flexibility during post-processing, and rely on manual focus for better accuracy in dim lighting.
Pro tip: To keep your nighttime shots steady and avoid blur, a sturdy tripod is a must-have for those long exposures.